October 2018 update: So, we’ve learned some stuff since posting this. First, we learned our doors are likely Miracle Doors, and they’re probably not solid oak. In fact, they are a mix of solid softwood and hardwood veneer. You can read more about Miracle Doors in our post here. Second, if you are a strict historic preservationist, this isn’t a “restoration” since we did not use historically accurate finishing materials, such as shellac. That said, we feel that we did “restore” the doors to their original, unpainted look. No matter what, our process hasn’t changed. Keep scrolling for the tutorial.
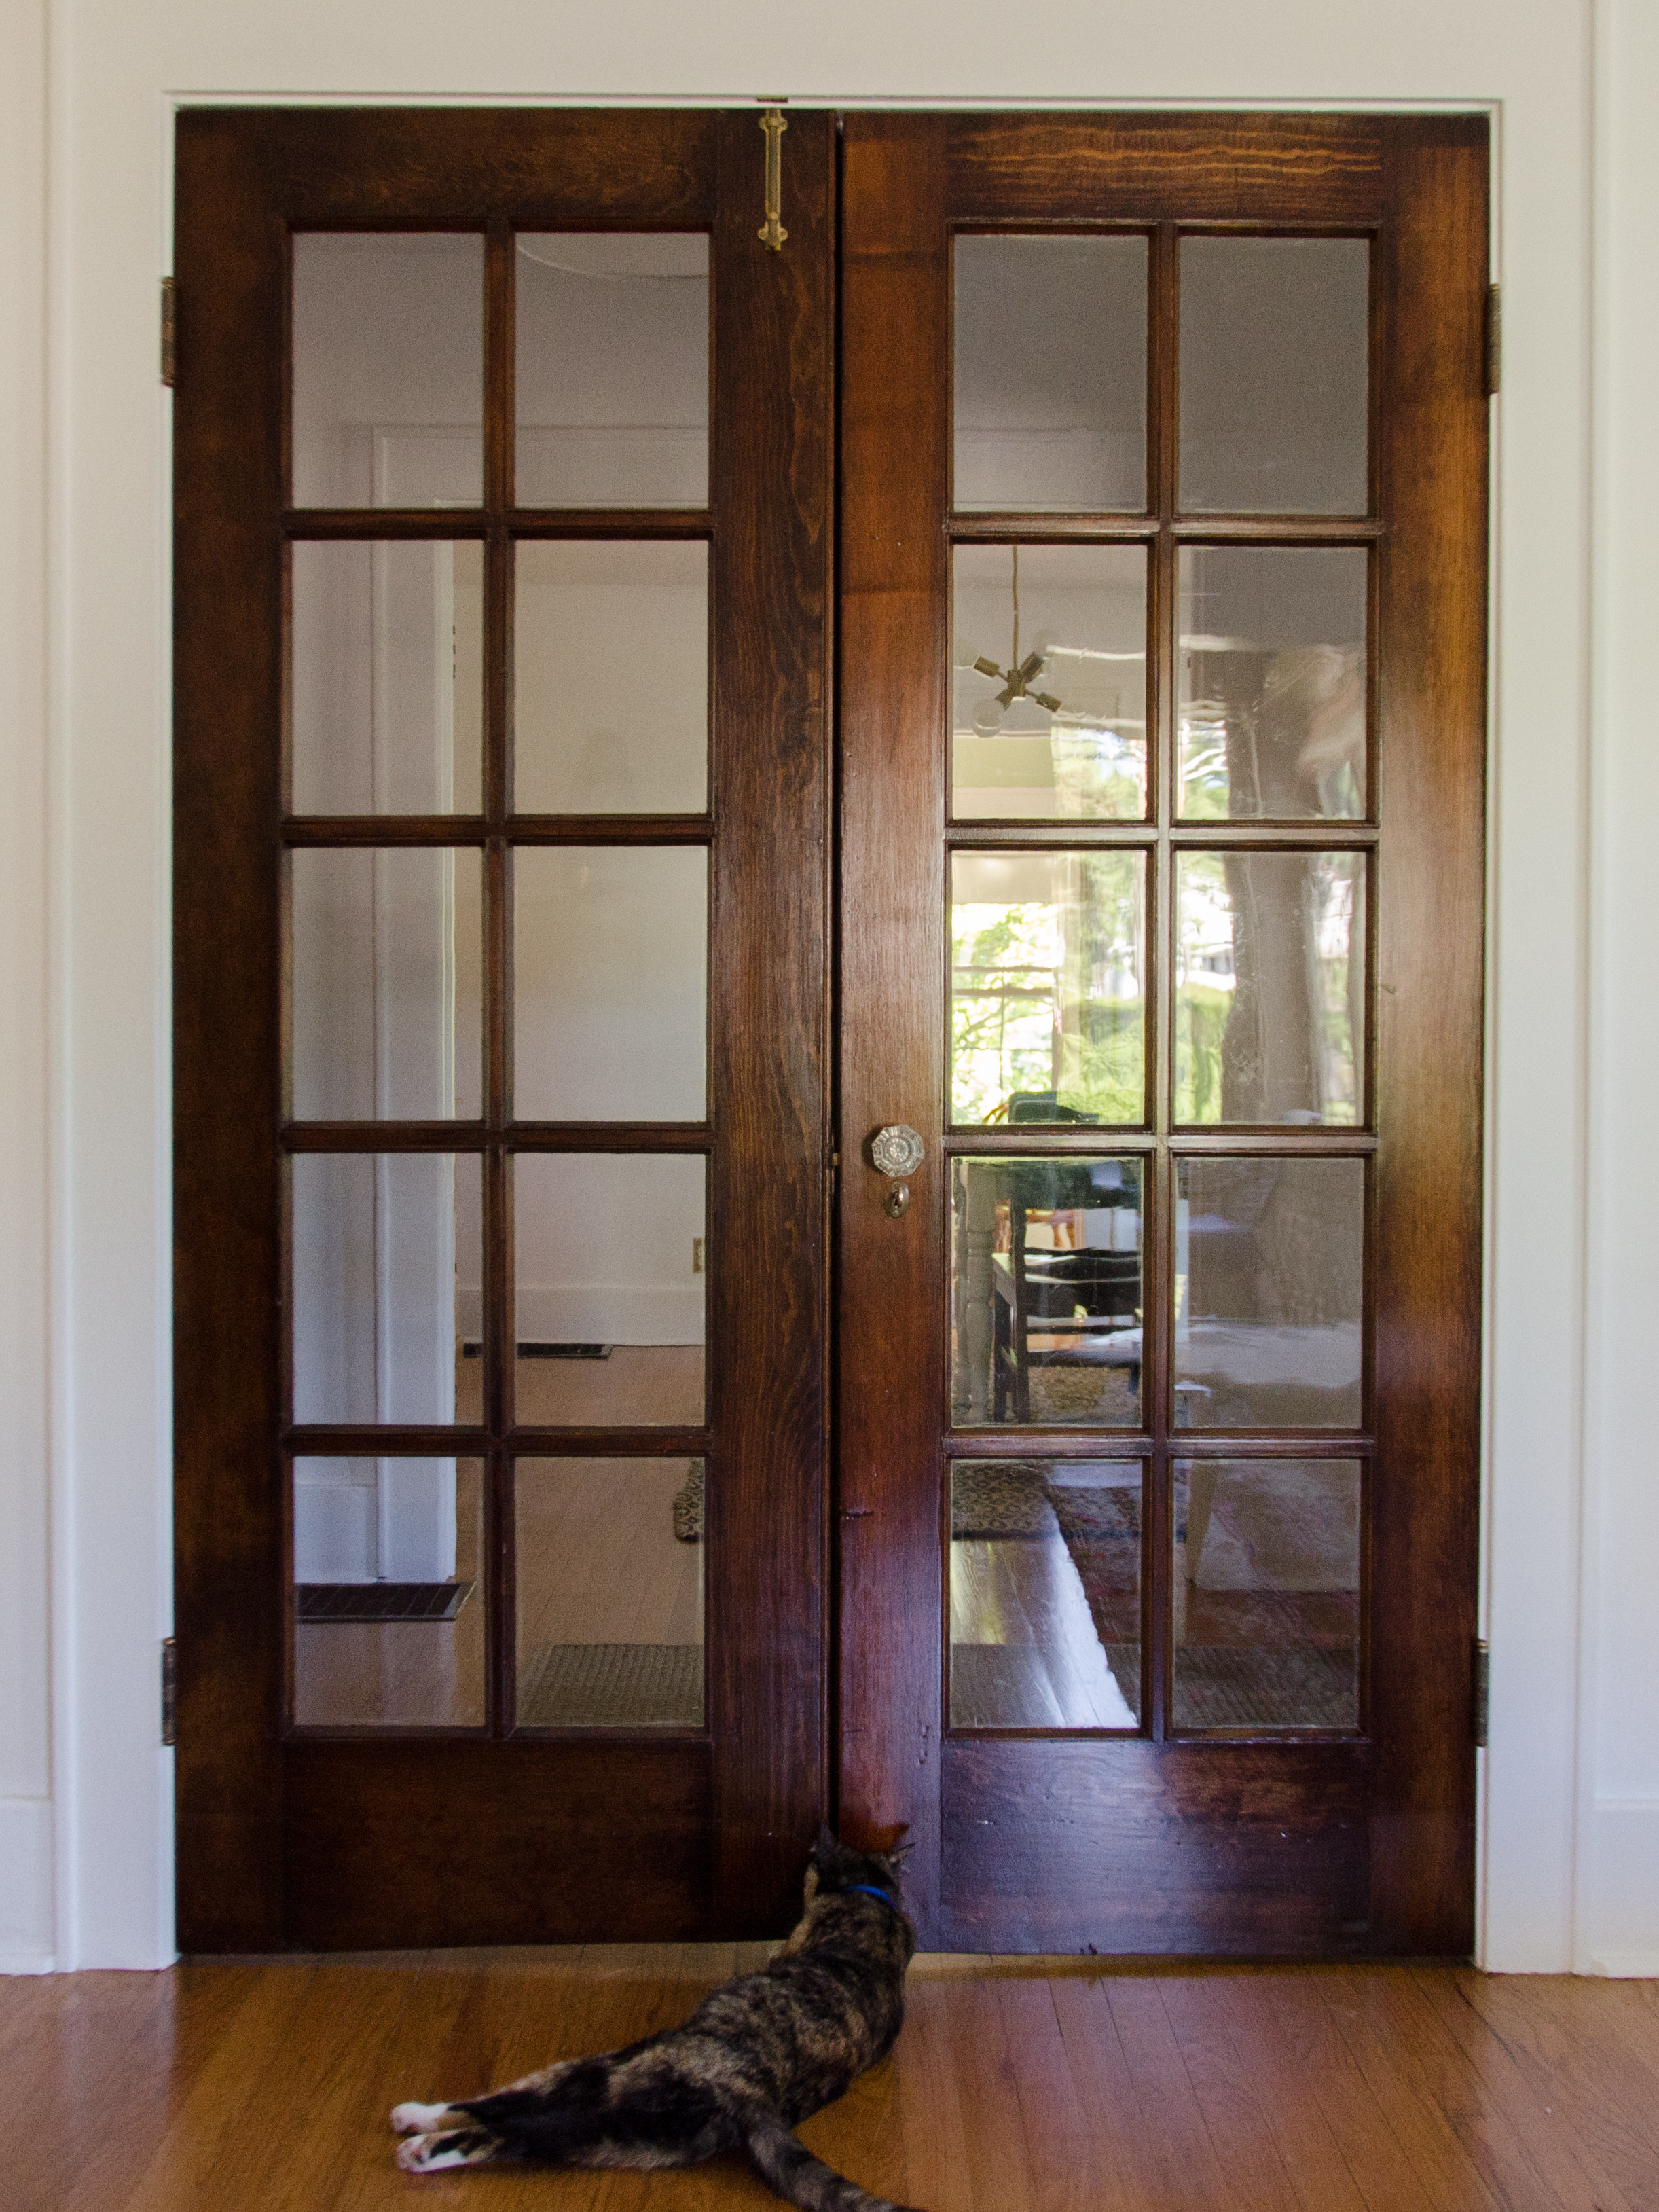
One of our latest projects was restoring the wood doors in our living room. There are four doors in total: a pair of French doors, and two doors to our screened-in porch.
Wondering what they looked like before we started? There aren’t many clear pictures from our updates, but I found a picture from when the previous owner was selling.
First things are the basics: removing the doors from the hinges and carefully moving them to our workspace downstairs. We also removed all the hardware. We stripped the paint from them using the crockpot method.
Important Notes & Safety Information
- Only use this method if you are sure that your doors are painted with modern, latex-based paint. We do not recommend you pursue this method for anything other than removing latex paints.
- This method works best for doors that are stained underneath the paint layer. If your doors have been sanded and then painted, or if paint has been applied to bare wood, this tutorial will not be helpful to you.
- If you are unsure about the composition of that paint you are trying to remove, we recommend using a lead testing kit and doing a patch test with the paint remover that you have chosen.
- Always wear proper PPE and work in well-ventilated areas away from children and pets.
The Crockpot Method for Restoring Hardware
For those who are curious, the “crockpot method” is the best way to remove paint from hardware. Also, I didn’t make it up but I found it somewhere on the internet. It goes as follows:
- Get an old crockpot that you don’t use for food anymore (because lead paint and chemicals and whatnot)
- Put in any hardware that’s covered in paint and needs a cleanup
- Put in enough water to cover for 1-2 inches
- Set crockpot to high
- Boil covered until the paint starts to bubble comes off.
You’ll still need to scrub and chip away the remaining paint, but the boiling water does most of the work for you. I recommend using the scrubby side of an old sponge or a plastic blade.
Prepping the Work Space
Once you have your doors free of hardware and in your workspace, use a couple of wood pieces covered in towels. This elevates the door off the work surface and protect your doors from the hard surface of the wood. The last thing you want is to dent the wood from pressure on the work surface.
Step 1: Remove the paint
Tools used:
- Heat gun
- Citristrip
- Mineral spirits
- Putty knives
- Small biology dissecting kit (We had one on hand, thinking that the small tools would come in handy. They did. In fact, we ordered another one. You can find them on Amazon.)
To take off the topmost layer of paint, use a heat gun on every surface of the door except for near the muntons and the glass. The latex paint shuold peel off in large chunks. You can use a putty knife to help remove the paint.
Once that heat gun work is done, now it’s time to use the pain stripper.
- Apply Citristrip (or your paint stripper of choice) to entire surface
- Wait at least one hour
- Scrape off Citristrip (or your paint stripper of choice) using a putty knife for main surface and dissecting kit for the nooks and crannies and around any muntons.
- Remove remaining Citristrip using mineral spirits to prevent staining and damage. For more stubborn spots, he also used steel wool.
- Let dry for a few days, because the mineral spirits raises the grain on the wood.
For the porch doors, we only restored one side. For our french doors, he restored both sides – so this process happened twice per door to get both sides.
Step 2: Repair and Patch
Tools used
- Wood filler
Fill any holes with wood filler. Our doors had a few holes where curtain rods and other coverings had been screwed or nailed into the wood. All of those needed filling.
Step 3: Sanding
Tools used
- Sandpaper (120 grit and 220 grit)
- Towels
- Vacuum
- Tack cloths
- Compressed air (for final cleanup)
Sand down every part of the surface to get rid of all the old paint, shellac, and stain. You want as smooth a surface as possible for your stain.
Sand with 120 grit sandpaper, then moved to 220 grit. You can also go straight to the 220 grit if you prefer.
Once done sanding, vacuum the entire surface, and wipe it down with a tack cloth. Finish with compressed air to make sure all the dust is gone.
Once sanding is done, there will likely be imperfections left behind. To cover up any spots of paint that can’t be picked out, use a brown paint that matches your stain and a small paintbrush to touch up the white and light spots. We recommend getting a small paint sample from your local paint store.
We also used antique glass we had from an old window to create a new windowpane.
Step 4: Staining and Finishing
Tools used:
- Frog tape
- Minwax pre-stain conditioner
- Minwax stain in Honey* (see note at the bottom of this post about stain color)
- Minwax Polyurethane in satin finish
- Clean brushes and sponges
And here are the steps we followed.
Important note: there is a lot of drying and curing time for the staining process, and it can take a minimum of four to five days to complete, depending on the weather conditions and humidity where you live.
- Apply pre-stain conditioner
- Wait 20 minutes
- Apply honey Minwax stain and quickly wipe of excess stain.
- Dry for at least 24 hours, sometimes more depending on humidity and weather.
- Apply satin polyurethane finish – starting with vertical surfaces, and then flat surfaces
- Wait 1-2 days
- Lightly sand with 220 grit sandpaper to remove any air bubbles
- Use a vacuum, tack cloth, and/or compressed air to remove dust
- Apply final coat of satin polyurethane
Step 5: Hang and Enjoy!
Finally, the clean hardware went back on, and the door went back on its hinges.
With every single door, we had to adjust and reset the doors. There were tons of tiny adjustments, taking the doors on/off the hinges, and lots of shimming. But in the end it all looks great, and the doors open, close, and lock better than they did before.
If you found this tutorial helpful, tag us in your project on Instagram @saltandrook – we’d love to see how your project turned out!


*A note about staining …
While we did use the “honey” color, these doors are approximately 100+ years old, so the wood has aged. What you see on the finished product is MUCH darker than the tests we did on scrap wood. If you use this tutorial, you’ll probably get a different result, too.
We chose a medium/light stain knowing that the doors wouldn’t come out exactly as we expected on the aged wood. We looked more at the undertones of the stain to make sure the final color didn’t go too red or too ashy/gray. The color also changes once you apply the polyurethane, so keep that in mind, too.
We’re incredibly pleased with the final color on this project, but it was much different than what our stain tests showed. If you have old doors and you plan to restore them, you will not be able to control or predict with 100% accuracy what color will turn out. You can only make the most educated guess and hope for the best.
