It’s finally time to talk about the most expensive project we’ve taken on so far: the roof replacement.
We became the owners of a 1915 Dutch Colonial home in late 2017. We knew we would need to replace the roof, so we immediately began to save up for it.
As the years went on, we started to find shingles in our yard … and we knew it was time. We wanted to fix the roof before it became an emergency. So in summer 2022, we booked a full roof replacement.
Here are some quick links to take you to the information you’re most interested in:
- The Results (AKA skip to the good part!)
- Quotes
- Replacing an original cedar shake roof
- Additional costs
- Siding damage
- What about the garage?
- What type and color shingles did we choose?
- How long did it take?
- Final Thoughts
Dutch Colonial roof replacement quotes
Here’s a rundown of the quotes we received for our full roof replacement in 2022. Some companies gave us several tiers of quotes, which are noted below.
Some important information before we dive in …
- Our home isn’t technically historic. While our home is over a century old, we neither live in a designated historic district, nor is our home on the National Register for Historic Places. This means our renovation projects – including the roof replacement – are not subject to approval from a historic preservation committee or the like. On the flip side, it also means the project was not eligible for state or federal historic preservation grants or tax incentives.
- We won’t disclose how we financed our roof replacement or what exactly we paid. But we will share the quotes, discounts, and pay structures that were provided to us. We hope you find this information useful.
- We aren’t comfortable providing company names. Mostly because we imagine that you, reader, is most likely from outside of the CNY area, and this information wouldn’t be helpful anyway.
- The below quotes assumed we would use financing. Two companies we spoke to offered a discount for cash or check payments. From our experience, we saw a range of 7-9% off the financed price for a 100% cash deal.
- All companies had different payment structures. We were surprised by the range of payment structures, too. They’re detailed below.
- All of our roofing contracts had language saying the homeowner would be responsible for unforeseen rises in inflation / materials costs, and that the roofing company was not responsible for any delays due to material shortages. I can’t speak to whether this language was present pre-COVID, but it is certainly standard practice now.
Roofing quote #1
- 4 quotes provided
- Tier 1: $29,500
- Tier 2: $28,771
- Tier 3: $28,117
- Tier 4: $23,869
- Discounts available: yes; approx. 9% discounts for cash or check payment
- Payment structure: No deposit to book; 66% due at start of job; remainder due at completion
Roofing quote #2
Note: This company specializes in restoration work, not just roofing. The rest of the quotes are from specialty roofing companies.
- One quote provided: $42,000
- Discounts available: yes, $3,000 discount (approx. 7%) for cash or check payment
- Payment structure: 50% due at start of job; 50% due at completion
Roofing quote #3
- 3 quotes provided:
- Tier 1: $30,261
- Tier 2: $26,256
- Tier 3: $24,253
- Discounts available: Offered price matching and an “automatic coupon” discount of $1,000; cash or check payment discounts were not specified but a 4% processing fee could be added if you pay with a credit card.
- Payment structure: $500 deposit required to book; remaining balance due upon project completion; additional charges for “unforeseen shingle layers” anywhere from $35 – $55 per square foot
Roofing quote #3
- One quote: $28,900
- Discounts available: Offered an “automatic coupon” discount of $1,000; cash or check payment discounts were not specified but a 3.5% processing fee could be added if you pay with a credit card.
- Payment structure: 50% due at signing; remaining balance due upon project completion
Replacing an original cedar shake roof
Every single company representative wanted to know the same thing:
“Do you still have original cedar shakes?”
And every time, I said:
“Yes, we do have original cedar shakes.”
The representative would grimace, give a long pause, and say something along the lines of:
“It’s going to be expensive.”
And I would reply:
“We know.”
Why is it expensive to remove original cedar shakes?
If you have an old house with original cedar shakes, most companies will tear off the cedar shingles and replace them with modern/conventional roofing materials, like OSB and asphalt shingles. This is the option we chose.
Of course, there are companies out there who offer replacement cedar shakes or specialize in historic roof restoration. But they were far out of our price range, and therefore, we did not pursue them.
Back to why it’s so expensive: roofing material is heavy. Couple that with a steep gambrel roof, and you’ve got a big project that presents a significant physical challenge for the crew. It’s a time-consuming, messy, and dangerous job.
By removing the cedar shakes, you open your home to the elements until the under layer is installed. If the weather is unpredictable, it can be risky.
So, to recap: old, heavy materials, dangerous, and risky. That’s why it’s expensive. If you have original cedar shakes with asphalt shingles on top, be prepared for a roofing quote that is 2-3x more expensive than the roof replacement “estimates” you’ll find online.
Additional costs
One cost we had prepared for: paint touch-ups. We paid $780 for paint touch ups on top of the roofing cost.
Why should you budget for paint touch-ups for a roof replacement? When asphalt shingles are laid over an original cedar shake roof, they inevitably build up over the siding.
When layers of roof are removed, some of the original siding will be exposed. You can usually see old paint, maybe even some rot if you’re unlucky (which is recommended to fix).
A note here: if you’re debating between roofing or painting your house first: DO THE ROOF FIRST. If you plan to do both, this order makes the most sense, even if it’s the more painful financial decision of the two.
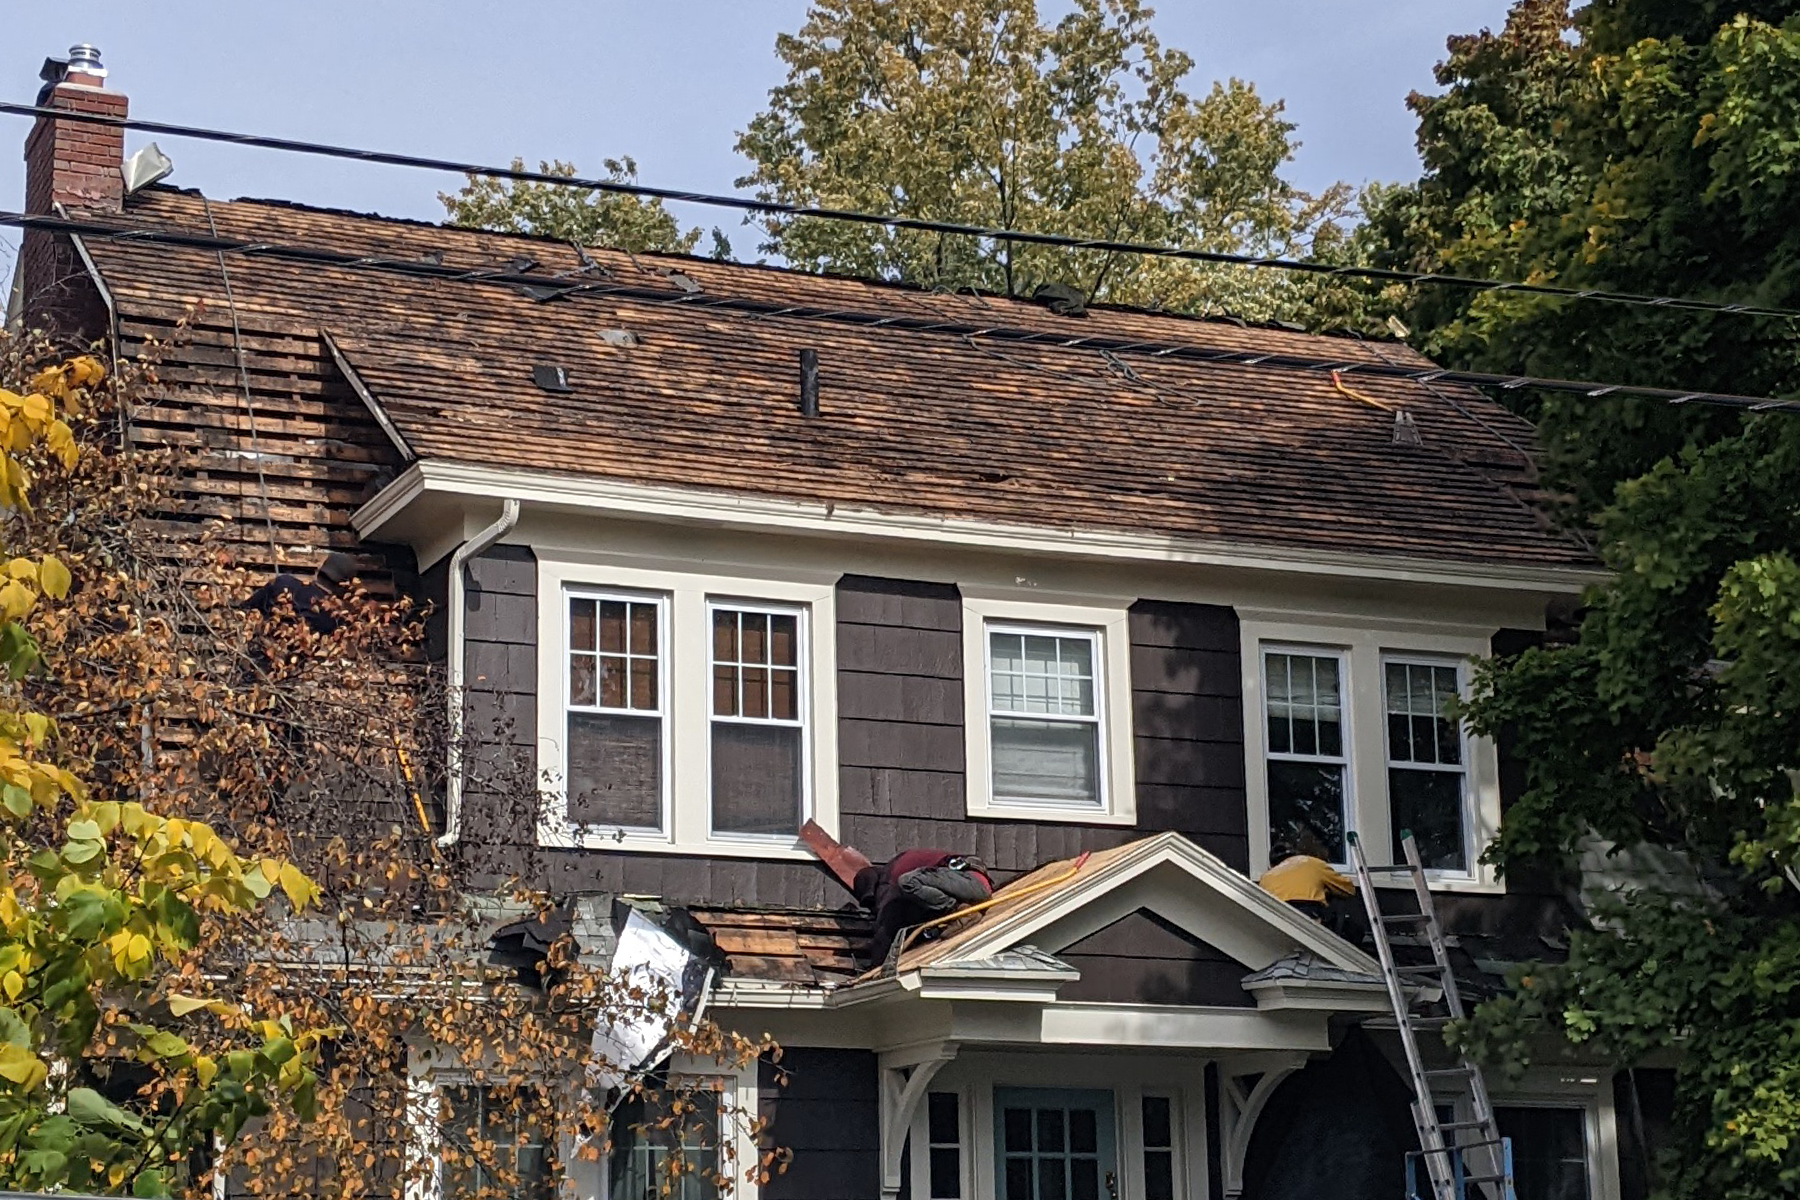
A note about siding damage …
Every contractor warned us about siding damage during the roof removal process. They recommended adding a piece of trim to the seam where the roof meets the siding. The purpose of this trim is to cover up the siding that has been damaged from removing layers of roof.
It is usually painted to match either the siding or trim on the house, depending on the homeowners preference. As it was explained to us, this is separate from flashing and is purely aesthetic.
 Adding trim is one solution to cover up damaged siding. After seeing some photos of it, however, I wasn’t satisfied with the aesthetics of it. I felt like it would ruin the charm of our Dutch Colonial house.
I asked if we could hold off on installing the wood trim until we could see what the shakes looked like underneath. Surprisingly, all of our potential contractors were understanding – if a bit skeptical. But it was important to me that we didn’t have a line of trim covering up our cedar shakes.
After the roof replacement, our cedar shake siding was well intact, if a bit roughed up from the roof removal (see the photo). We opted to forgo the wood trim, and instead contacted our original paint crew (Seth Paints) to do touch ups.
Seth sent along a two-woman crew that finished the touch-ups in two sessions spread over two days. We’re happy that we skipped the wood trim and are pleased with the touched-up paint job.
What about the garage?
Ah, yes. The garage. Like many old houses, we have a detached garage. Our roofing quotes did not include our garage because we had already replaced the garage roof ourselves the year prior.
We used stock shingles from Lowes in a light brown color. We told our roofing contractors to best match the roof color with the shingles we selected in our contract. They were able to get a pretty close color match, and we were happy with the final color. Which reminds me …
What type and color shingles did we choose?
Our contractor used GAF Timberline HDZ shingles in the color “Shakewood” to match our garage. This was a change from our previous gray roof.
How long did our full roof replacement take?
For our ~1,600 sq. ft. Dutch Colonial home, our roof took five days to complete. That includes a day that it rained and no work was done.
- Work started on a Tuesday
- Rained on Wednesday (no work done)
- All day Thursday
- All day Friday
- Most of the day Saturday
Final thoughts
Despite the size of the job, it all went fairly smoothly, with two minor issues that were fixed by the roofing company. But overall, we had a positive experience: we knew what to expect, communicated often with the project manager, and our questions were answered quickly.
The two issues we had:
- Window damage: A rogue shingle pierced the frame of a vinyl window during the roof removal.
- Gutter damage: during the removal process, some heavy debris hit one of our gutters and was partially torn off.
Thankfully, the roofing company responded quickly. In this case, they reinstalled the gutter and replaced the damaged window. So everyone was happy.
Other than finding the occasional roofing nail in our yard and gardens, the clean up was pretty good, too.
Before & After: The results


That’s all I’ve got for you. Is there anything you want to know? Let us know in the comments and we’ll do our best to answer.